FIELD NOTES // WESTERN FRONT
THE LINE
THAT
WOULDN'T
MOVE.
An army can cross a country in weeks. Then spend four years trying to cross a field.
The last map in Thirty Seven Days ends with a trench line. This is what happened inside it—and why getting out could be worse.
01 / THE MACHINE BENEATH THE MUD
IT'S NOT
ONE DITCH.
The front line was the part the enemy could see. Behind it lay more trenches, communication routes, reserves, and shelters. Explore a simplified defensive system. Then imagine trying to get through all of it.
RECONNAISSANCE REPORT / CLICK A MAP MARKER
The place everyone wants to leave
A forward firing trench with a raised fire step, a protective parapet, and sentries watching the enemy. Traverses made the line bend to reduce the effect of fire and explosions traveling down a straight trench.
The layout represents a typical Western Front system, not one named battlefield. Widths, spacing, and depth varied.
Read every zone without the interactive map
Front line: firing position with parapet, fire step and traverses. Wire: entanglements slowed attacks under fire. No Man's Land: exposed, shell-torn ground between armies. Support and reserve: backup positions, stores and soldiers behind the front. Communication trenches: angled paths moving people, orders, ammunition and casualties.
02 / A DAY THAT NEVER REALLY ENDS
WAIT. WATCH.
DIG. REPEAT.
The trench was a workplace as much as a battlefield. Much of the day meant waiting, digging, carrying, repairing and trying to stay dry. Choose an hour; the work changes.
05:00 / FIRST LIGHT
Stand-to. Every rifle ready.
Before dawn, soldiers took positions expecting an attack at one of the day's most dangerous moments. If nothing came, inspections and breakfast followed. Even an uneventful morning began on edge.
SHIFT LOG / SELECT A TIME
Snipers made exposed daytime work dangerous. In darkness, carrying parties, wiring teams and patrols could move—but were hardly safe.
What cannot wait?
Water collects. Walls collapse. Men need food, clean socks, ammunition and medical care. The war can be quiet without being harmless.
This is a composite routine drawn from Canadian War Museum and Australian War Memorial accounts; it does not represent a particular soldier's diary.
03 / THE ATTACK PROBLEM
CROSS
THE GAP.
You are an officer planning a hypothetical attack on a defended sector. Your goal sounds simple: get soldiers across No Man's Land and hold an enemy position. Every choice exposes a tradeoff. There is no magic winning combination.
Original teaching diagram · schematic, not a reconstruction of a named attack
Modern artillery, machine guns and wire made defending easier than crossing exposed ground. An artillery bombardment might cut wire—but could also crater the ground and warn defenders. The simplest attack plan often depended on assumptions it could not verify.
OPERATIONS DESK / CHANGE THREE ORDERS
PRESS EVALUATE
What could go wrong?
Make your three choices. You will receive a historical tradeoff, not invented casualty probabilities.
04 / CASE FILE · THE SOMME, 1916
THE COST OF
A FEW MILES.
British and French forces tried to break German defenses along the Somme. Step through four moments. Look for the gap between a new weapon, a local success, and an overall breakthrough.
A week of shelling was not enough.
British leaders expected artillery to destroy German defenses and cut the wire. In many sectors, German defenders survived in dugouts and emerged when the shelling stopped. The infantry went forward into devastating fire. Elsewhere, including parts of the French sector, attacks made important gains. The result was not the planned breakthrough.
BRITISH ARMY · JULY 1
The red portion is deaths within the casualty total—not a percentage of all soldiers who attacked. Figures from Imperial War Museums' 1916 timeline.
THE TECHNOLOGY QUESTION
September 15: a tank enters the story.
British Mark I tanks first fought at Flers–Courcelette. Some helped infantry capture positions. Many broke down or got stuck. A dramatic new machine was not yet an answer to the entire defensive system.
See a period tank photograph and the National Army Museum record ↗
READ THE RESULT CAREFULLY
Did the line actually never move?
It did move, sometimes significantly in individual sectors. The title names the larger failure to achieve the rapid breakthrough leaders expected, not a claim that every trench stayed in place. Geography, weather, command, supplies and adaptations by both sides mattered.
05 / THE EVIDENCE TEST
DON'T CONFUSE
A WEAPON
WITH A WIN.
Classify four claims. A good historical explanation distinguishes what the evidence shows from what a dramatic photograph or statistic might make you assume.
06 / YOUR FIELD REPORT · ABOUT 6 MINUTES
EXPLAIN
THE DEADLOCK.
Write two or three sentences for each. Use at least one specific feature from the diagrams, routine or Somme case file. Your answers save with The Desk's shared work controls.
SOURCE DESK / OPEN THE RECORD
WHAT THIS
IS BUILT ON.
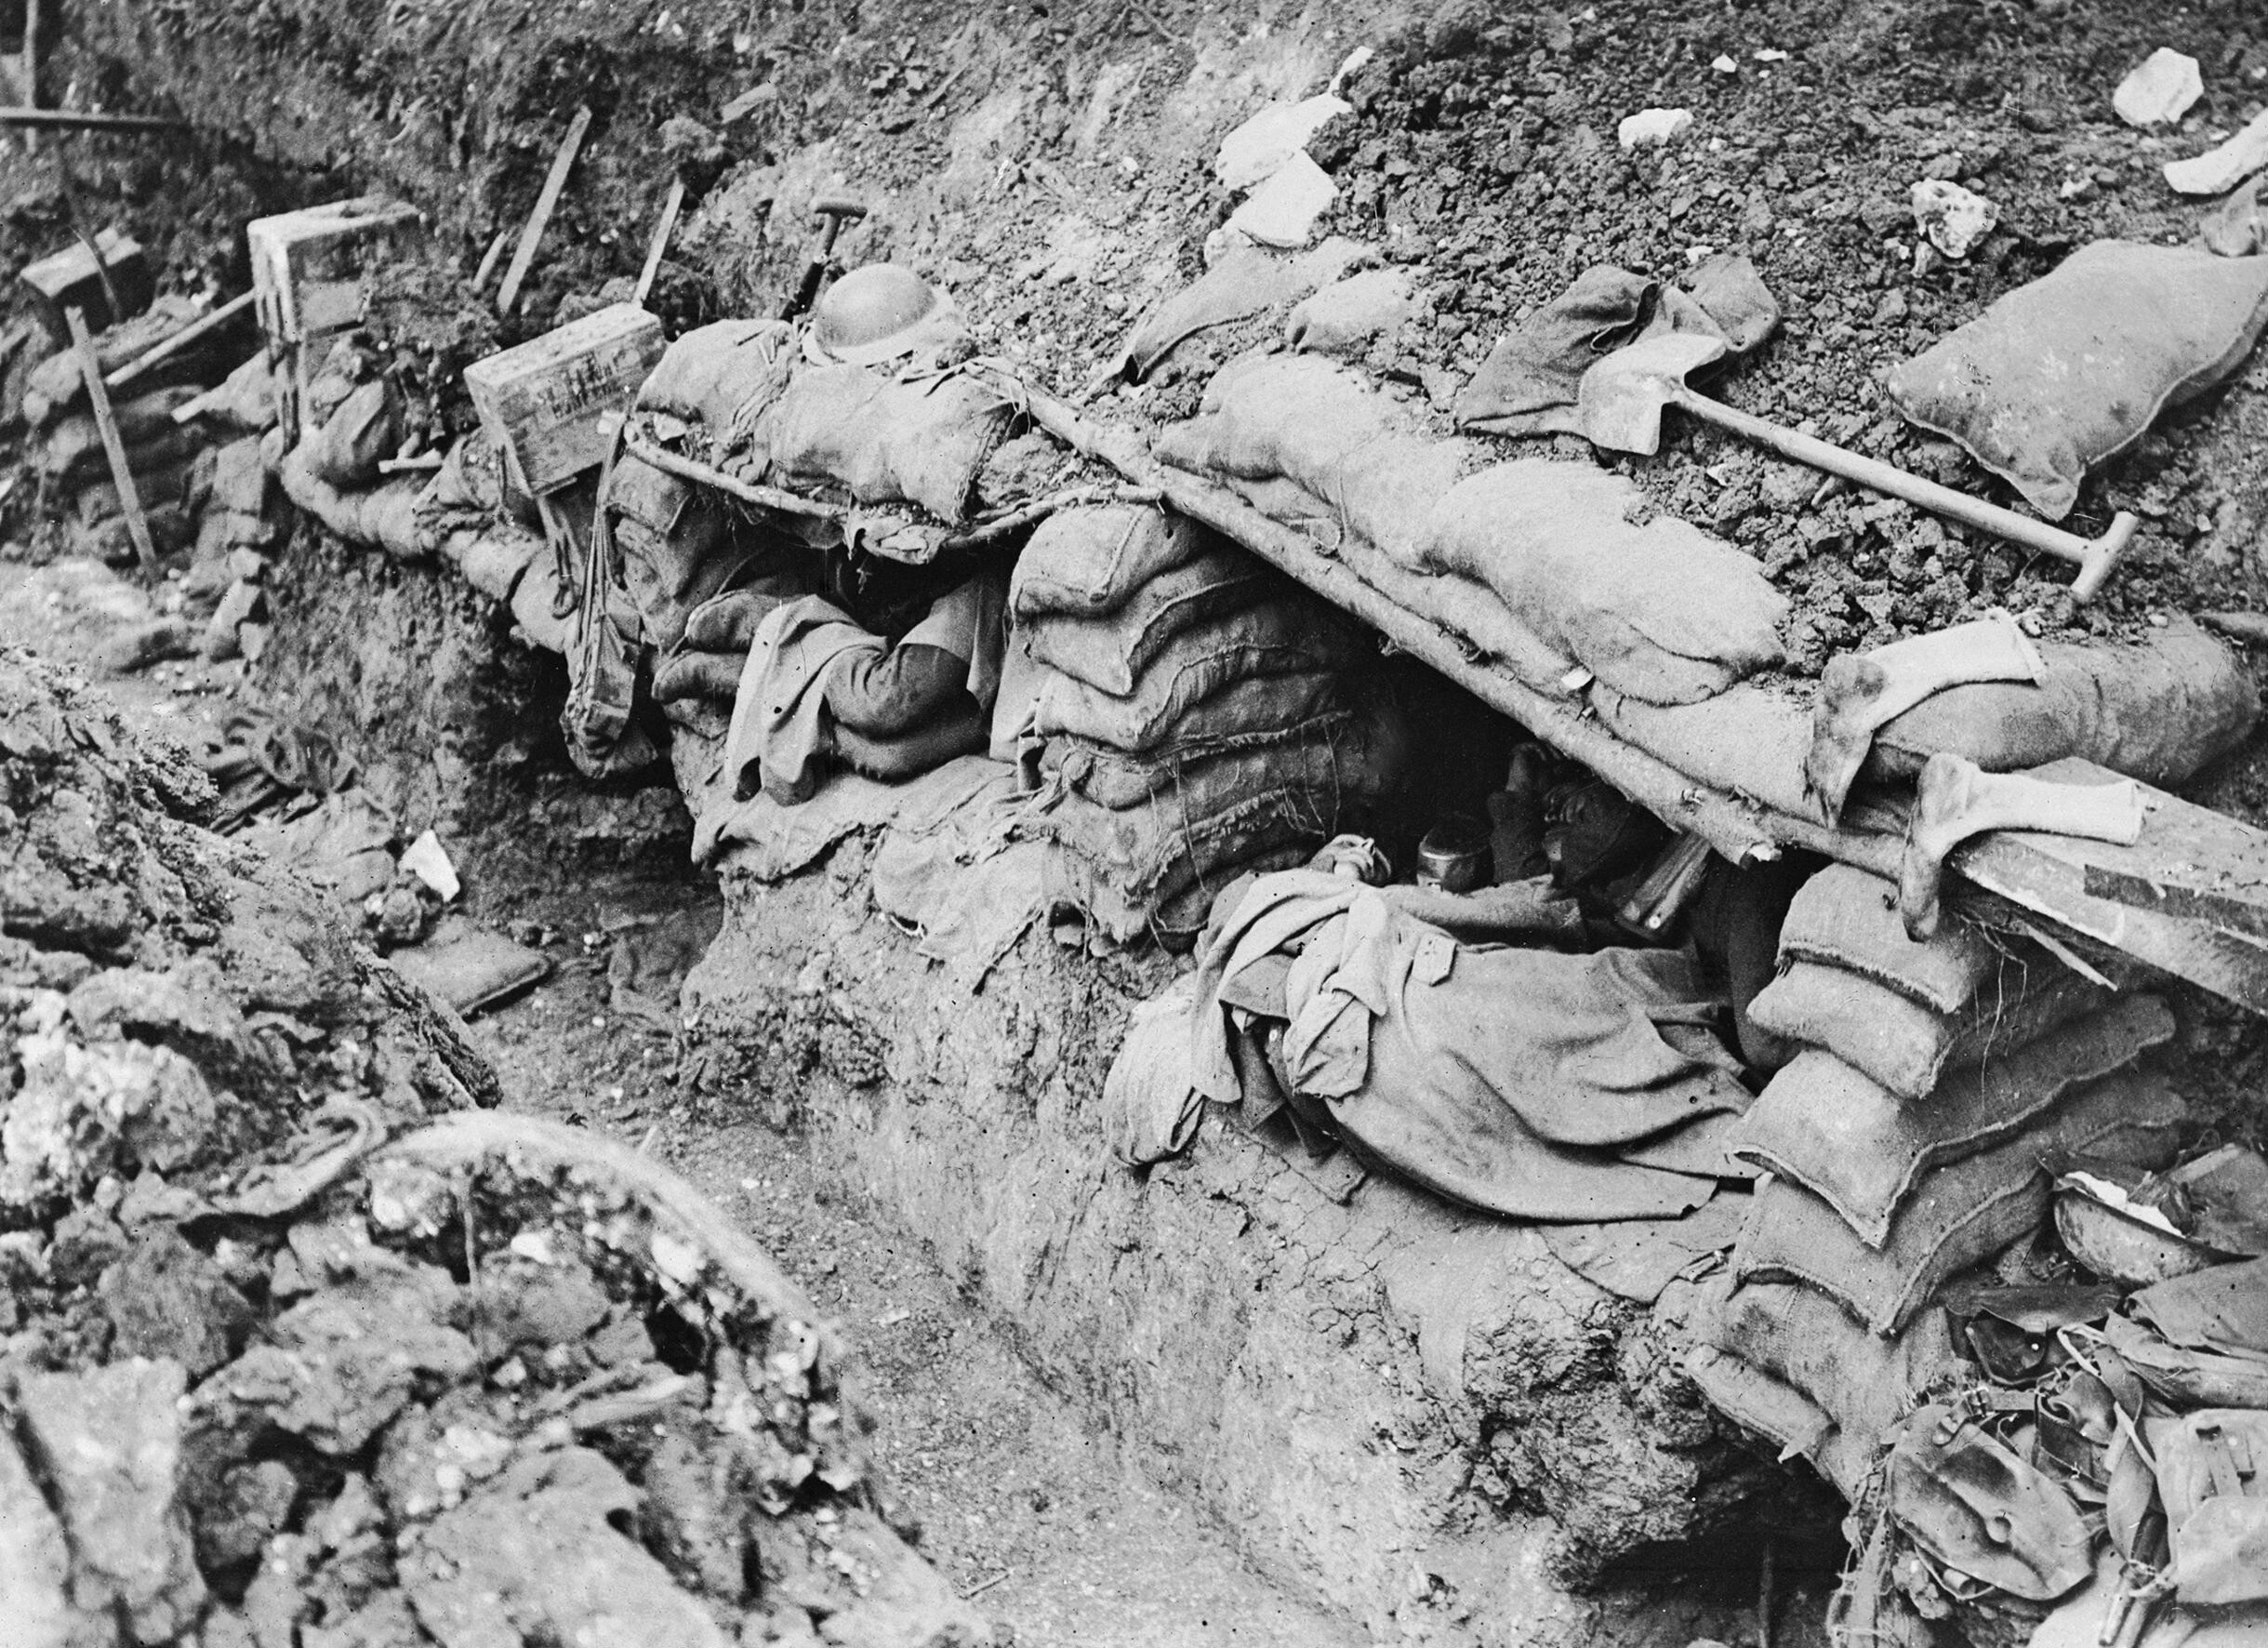
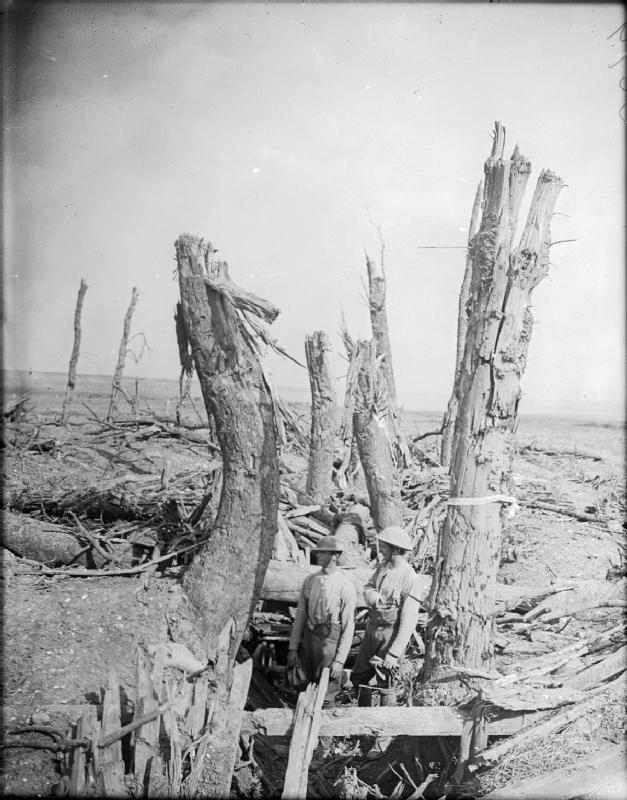
Every map and cross-section here is a teaching schematic. Every period photograph is an archival image, not AI-generated. The tactical exercise shows documented tradeoffs; it does not simulate or predict human casualties.
- National WWI Museum and Memorial — Trench Warfare. Front length, conditions, defensive systems.
- Canadian War Museum — Trench Routine. Dawn stand-to, daytime work, nighttime patrols.
- Australian War Memorial — Western Front background. Defenses, weaponry and trenches.
- National Army Museum — Weapons of the Western Front. Artillery, wire, dugouts, changing tactics.
- Imperial War Museums — WWI 1916 timeline. July 1 casualty figures and chronology.
- National Army Museum — First tanks on the Somme. September 15 at Flers–Courcelette.
- IWM Q 4135 via Wikimedia Commons. September 1916 trench shelters; John Warwick Brooke. Public domain.
- IWM Q 4338 via Wikimedia Commons. Wrecked trench at Ginchy; John Warwick Brooke. Public domain.
Accuracy notes and limitations
The 475-mile figure is approximate and refers to a complex system, not a single uninterrupted trench. Tactical sketches show relationships without scale. The casualty count is British Army losses on July 1, not the entire battle or all belligerents. The July–November narrative describes a Western Front case study, not every theatre of the First World War. The short assault-planning activity avoids made-up kill rates, random casualty scores or claims that its choices could have guaranteed success.